


How to Replace and Install Your USB Outlet
When we are going to replace a socket with USB charging, we consider the size of the replacement socket. The standard socket is very thin (only a little wider than the thumb). Upgrade sockets with integrated USB charging are much thicker.
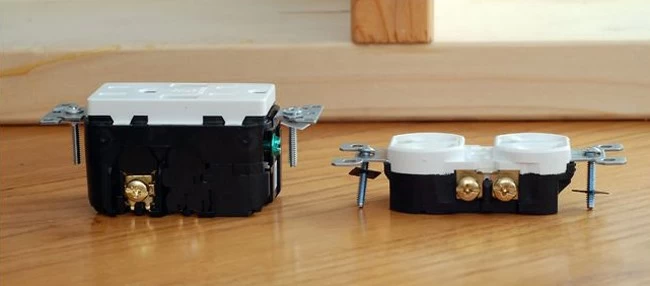
Physical size: DC transformer somewhere
In the photo above, you can see that the thickness of the USB connector on the left is about twice the thickness of the standard socket on the right. What you lost outside the socket (all those messy USB chargers), you actually transferred to the inside of the socket by loading the AC-DC transformer into the socket box.
In newer homes (or older homes with upgraded electrical systems), this shouldn't be a problem because modern outlet boxes are deep enough - it's a compact but not an unmanageable assembly. In older homes with lighter outlet boxes, you need to replace the old wall box to accommodate the huge upgrade.
How to install a USB socket
Again, before we continue, we want to emphasize that this is a confident DIYer project. If you don't know what you are doing, contact a licensed electrician (or at least a friend who is very proficient in DIY) before continuing.
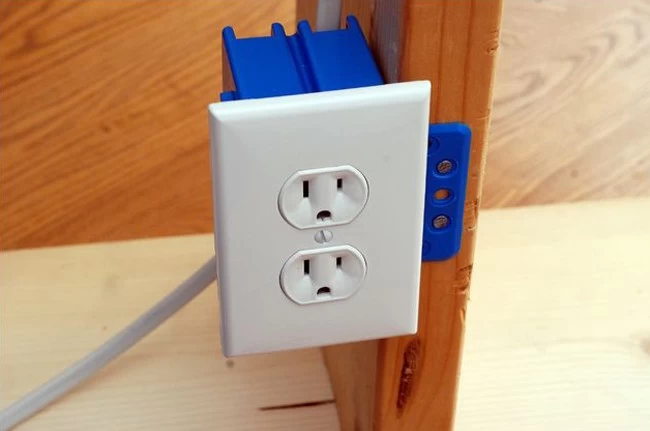
For the purposes of this paper, we have built an analog (but operational) electrical wiring setup using some waste wood and basic electrical components, as shown above. This setting is the same as what you found in modern homes (of course there is no drywall).
Step 1: Turn off the circuit to ensure safety
The first business is to disable the working circuit by turning off the circuit on the electrical breaker box. If the circuit in which the particular outlet is located is not known due to missing or unclear labels in the breaker box, you can turn off the entire circuit breaker at any time.
Confirm that the power is off by plugging in the light or socket tester at the socket level before continuing and telling everyone at the residence that you are working on the outlet and not touching the electrical panel.
Step 2: Remove the old socket
Since we know that everything is safe, the next step is to remove the old socket. The most important part of this step is to pay close attention to how the wiring is connected to the old outlet. A digital camera is your friend: grab your camera or smartphone and take a photo of the process in case you need to remember it slowly.
Use a screwdriver to remove the panel and then remove the longer screws that secure the actual socket into the box. At this point, your settings should look more or less like the photo below.
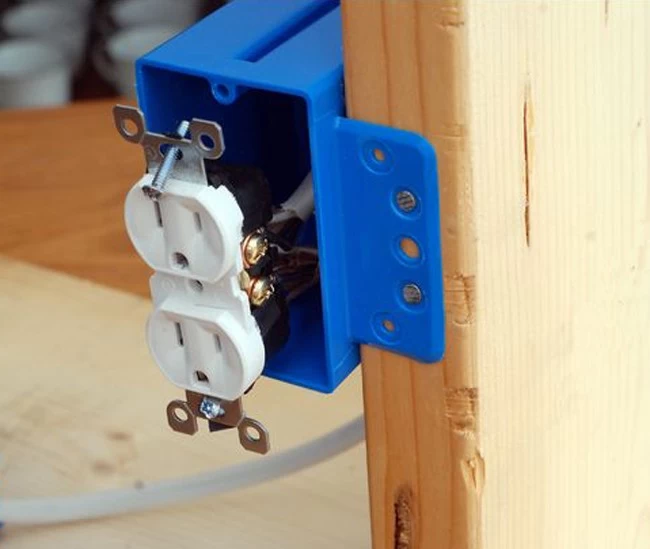
The way the cabling is connected to the outlet may vary depending on the socket design. Some sockets have side screws, some have side screws, and the splints are small. Some sockets even have a peg system on the back, and the wiring is directly plugged into the socket. Use a screwdriver to carefully relieve the pressure on the wiring and then remove the socket from the box.
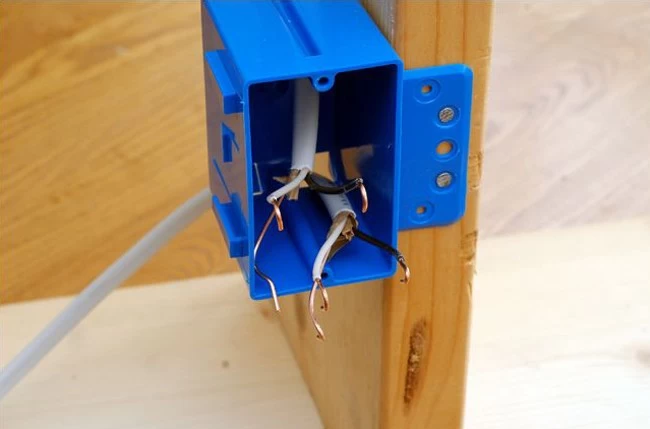
At this point, you should have a setting similar to the one shown above. There should be at least hotline (black), neutral (white) and ground (green or bare), but if the exit is in the middle of a series, there may be two sets of lines.
Depending on the style of the box, the ground wire can be part of the wire harness (for plastic boxes) or a small separate wire that is directly grounded to the box (for metal box/cable sockets, the box itself is part of the ground). Also, if there is no grounding wire in your box (as part of the wiring harness in the plastic box or directly connected to the metal box), consult a qualified electrician to properly ground your outlet.
Step 3: Install a new outlet
If you have already done this, the last step is the easiest: you only need to change the whole process, but use a new socket.
Reconnect all wires to the new outlet. The black wire is connected to the brass screw, the white wire is connected to the silver screw, and the ground wire is connected to the green ground screw. In the photo below, during the installation process, you can see that we have connected black to brass, white to silver, and the ground wire is connected to the green screw at the bottom. Outlet box.

Once the wires are properly connected and there are no cross-connections between any bare wires that do not match the color (for example, bare white can touch bare white, but bare ground wires should not touch white or black exposed wires or terminals), gently push Plug the outlet back into the socket box and use the outlet screw to pull it down.
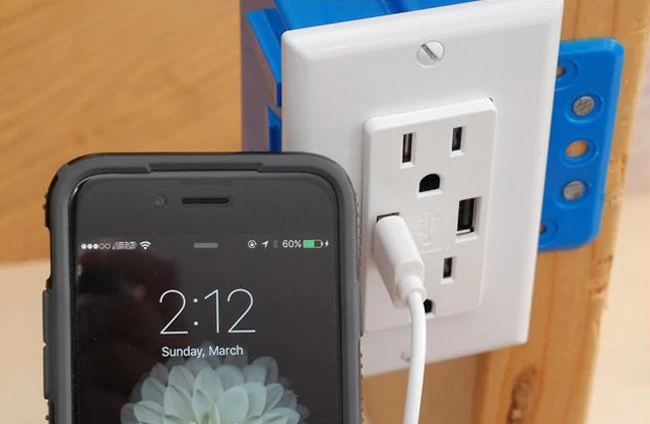
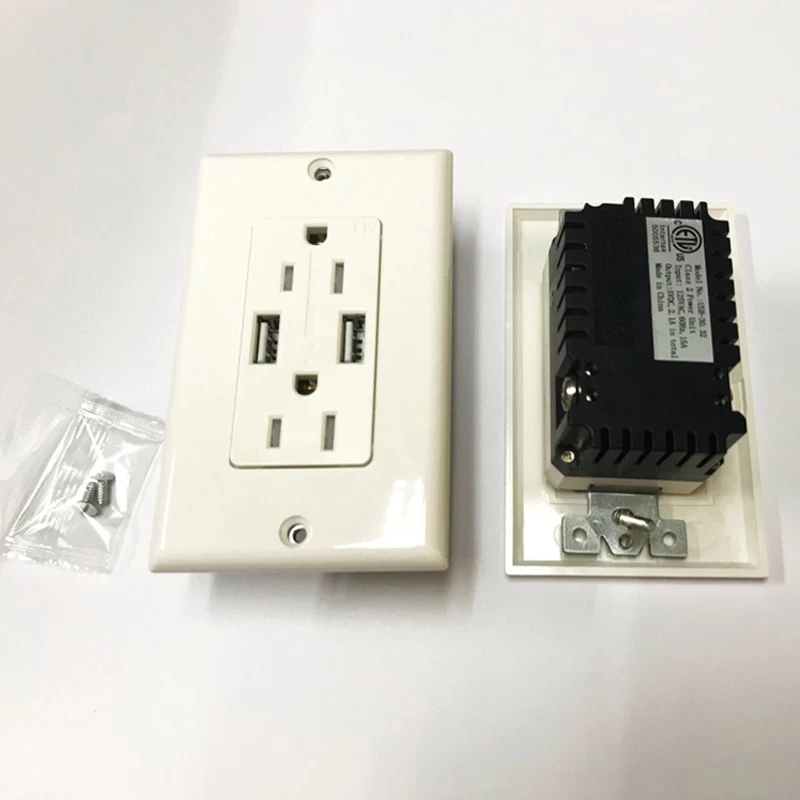
Reinstall an appropriately sized outlet panel (you will notice that we have to replace our two-hole outlet plate to match the new outlet with a large single-hole rectangular plate) and that you are operating. Plug in the USB cable, connect the device, and the wall 疣 free charging is at your fingertips.
